Smart Scheduling
Smart Scheduling allows you to fill out your schedule for a day quickly, using templates that you have created.

Once you apply a template (or if there are any unassigned shifts on the page) press the green button that says "Smart Scheduling" in the upper left of the Manage Schedule page. Here is a breakdown of the Smart Scheduling window that appears.
- The window is divided into two main areas.
- The left side is a view of all of the shifts you are about to fill with reference to their position and the time slot.
- The right side is the place where you assign a person to each shift, and where you will see the recommendation system working to help you. The employee cards are viewed here and they display a wealth of information.
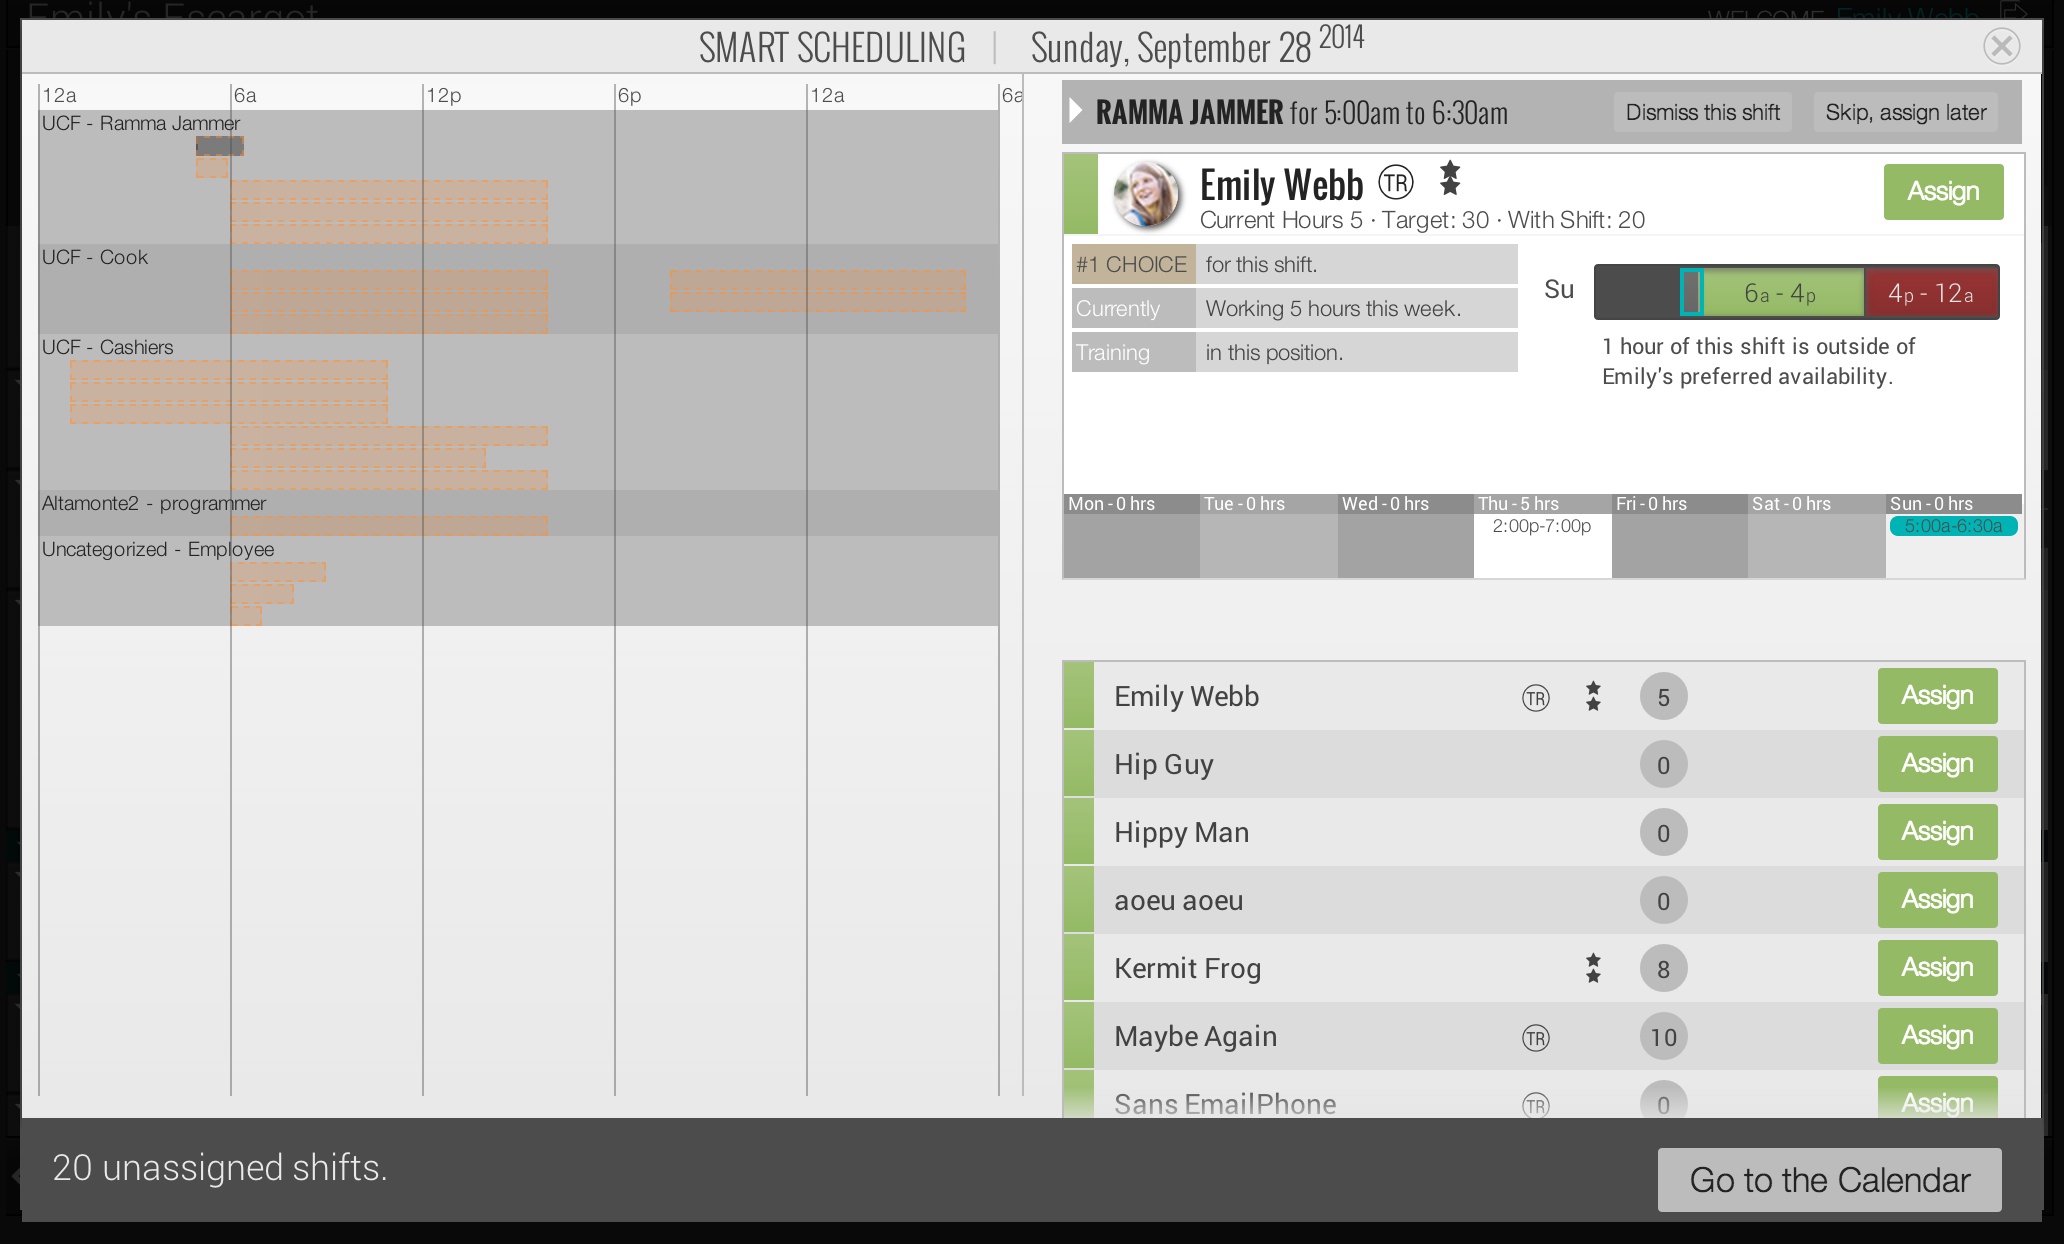
The left side of the window: This side shows the shifts-on-this-day view that come from the template you applied on the calendar page:Shift Color Key:
|
On the right side of the window:The top portion displays the selected employee card. The first one to appear is the top recommendation by Shift Agent for the shift you are filling currently.If you click on a name in the list below, it will display that employee's card in this area with all relevant information.The bottom half of this side shows the list of every employee who has the position of the shift you are filling. Employees are listed in the order of highest recommendation to lowest for the current shift.Tap one of the names, and their employee card will display above. Click "Assign" on the person you wish to fill the shift. |
When you are finished When you have finished filling all of the shifts that you want to fill, click "Go to Calendar" to switch back the the calendar view. All of the shifts you filled, and all of the shifts that you wanted to assign later will be placed on the calendar. Any shifts that you dismissed will not be present on the calendar. If you do not completely finish the template, only those shifts that you assigned or wished to assign later will show up. If you want to go back and finish filling out the whole template later, you can click on the apply template button and you will see an "*" next to the template that you applied. Click that template again to finish.